Making jerky at home is simple, cost-effective, and gives you full control over ingredients and flavor. Store-bought jerky can cost over $32 per pound, but homemade versions average just $12.50 per pound. By choosing lean cuts of meat, creating your own marinades, and using either a dehydrator or an oven, you can tailor the texture and taste to your liking. Proper storage ensures your jerky stays fresh for weeks or even months.
Key Points:
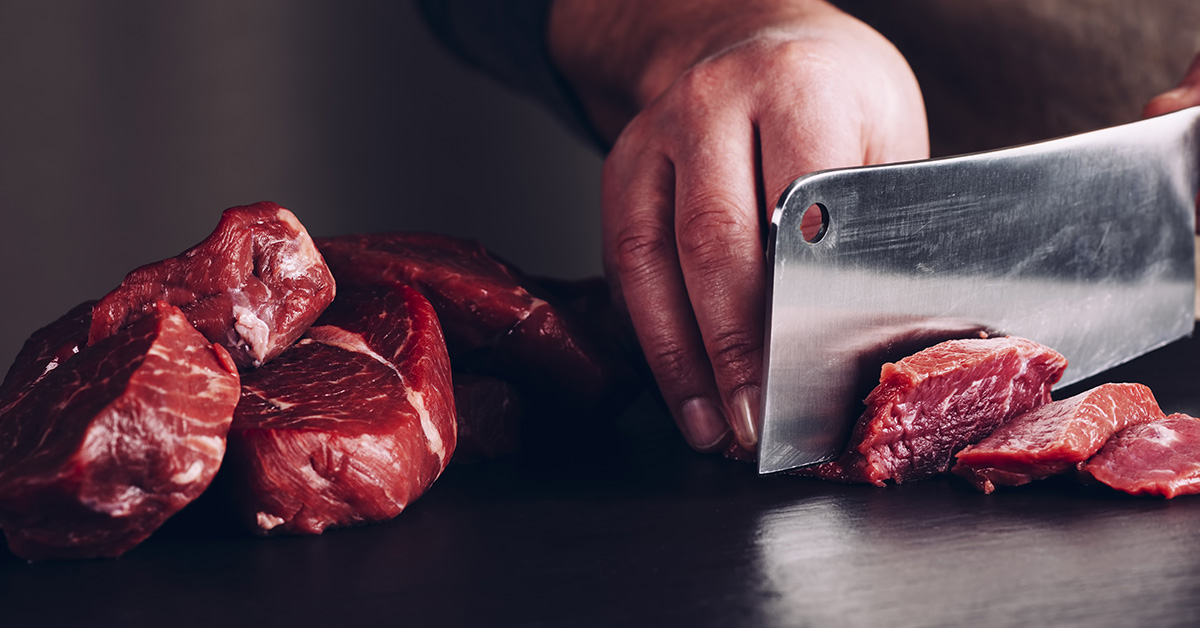
- Meat Selection: Use lean cuts like top round, bottom round, or venison. Trim all visible fat to prevent spoilage.
- Preparation: Slice meat into uniform strips (1/8 to 1/4 inch thick) for even drying. Freeze briefly for easier slicing.
- Marinade: Combine salty, sweet, and savory ingredients like soy sauce, Worcestershire sauce, and spices. Marinate for 6–24 hours.
- Drying Methods:
- Dehydrator: Precise temperature control (160°F), 4–8 hours drying time.
- Oven: Set to 170°F–200°F, keep door slightly open, 3–6 hours drying time.
- Storage: Use airtight containers or vacuum-sealed bags. Store at room temperature (1 week), refrigerate (2–3 weeks), or freeze (6–12 months).

Homemade jerky is a versatile snack that’s easy to make and customize. Whether you prefer sweet, spicy, or smoky flavors, the process is straightforward and rewarding.
The Guide to Perfect Beef Jerky: Including Venison Recipe
Choosing the Right Meat
Selecting the right meat is a crucial first step in making great jerky. Lean cuts are key because fat doesn’t dry out properly and can lead to spoilage. Fat also gives jerky an unpleasant texture and shortens its shelf life, so starting with the right cut is essential.
Best Cuts for Jerky
When it comes to beef, top round and bottom round are top choices. These cuts are naturally lean, budget-friendly, and have the ideal muscle structure for drying. Top round offers a bit more tenderness, while bottom round provides excellent value. Both work beautifully with the preparation techniques outlined below.
If you’re looking for something even more tender, sirloin tip is a great option. It’s lean enough to dry well but has a slightly different texture that some people prefer. Eye of round is another solid choice, though it can be tougher if not prepared properly.
For those who enjoy wild game, venison makes outstanding jerky. It’s naturally lean and has a rich, distinctive flavor that pairs well with bold seasonings. Companies like Wild Country Meats process venison and other wild game, ensuring clean, well-handled cuts that are perfect for jerky making.

Pork can also be used, but it requires extra care. Cuts like pork tenderloin or lean pork loin work best, but you’ll need to trim off all visible fat thoroughly. Pork’s mild flavor makes it a great base for experimenting with different marinades.
No matter the meat, always trim away any visible fat and silver skin to ensure your jerky dries properly and stays fresh.
Preparing the Meat
Once you’ve chosen the right cut, preparation is key to consistent results. Uniform slices are critical for even drying. To make slicing easier, wrap the meat and place it in the freezer for 30 to 45 minutes. For larger roasts, let it chill for 1 to 2 hours. The goal is to firm up the outer layer while keeping the inside soft.
Slice the meat into strips 1/8 to 1/4 inch thick. Cutting against the grain will result in a more tender texture, while slicing with the grain creates a chewier jerky. Whichever method you choose, consistency in thickness is more important than being exact.
A sharp knife is essential for clean, uniform slices. If you plan to make jerky often, investing in a jerky slicer can save time and help produce even strips, though it’s not a must-have.
For tougher cuts, tenderizing can make a big difference. Use a meat mallet or marinate the slices in natural acidic ingredients like lemon juice or pineapple juice. Unseasoned meat tenderizers containing bromelain are another effective option.
Starting with premium cuts from Wild Country Meats, trimmed and prepared correctly, gives you the perfect foundation for delicious jerky.
Making Marinades and Seasonings
Marinades not only add flavor but also help tenderize meat, making it more enjoyable to eat. A well-balanced marinade brings together salty, sweet, and savory notes to enhance the taste of the meat.
Salt is a must-have ingredient in any marinade. It helps draw moisture out of the meat, aids in preservation, and allows flavors to penetrate deeper. Soy sauce, with its salty and umami-packed profile, is another essential component.
Basic Marinade Recipe
For a classic jerky marinade that pairs well with any type of meat, use the following ingredients for 2 pounds of sliced meat:
- 1/2 cup soy sauce
- 1/4 cup Worcestershire sauce
- 2 tablespoons brown sugar
- 1 tablespoon garlic powder
- 1 teaspoon black pepper
- 1 teaspoon onion powder
Combine all the ingredients in a bowl, stirring until the brown sugar fully dissolves. Add the meat strips and mix until they’re evenly coated. Cover and refrigerate the mixture for 6 to 24 hours – shorter marinating times work best for tender cuts, while tougher meats benefit from a longer soak.
Drying Your Jerky: Dehydrator vs. Oven
Once your meat has soaked up all the flavors from the marinade, it’s time to turn it into jerky. You’ve got two solid options for drying: a food dehydrator or your oven. Both methods work well, but they come with their own perks depending on what you have on hand and how often you plan to make jerky.
Using a Food Dehydrator
A food dehydrator is specifically built for drying foods, making it a great choice for jerky. These devices maintain a steady 160°F and circulate air evenly, ensuring your meat dries consistently.

To get started, lay the marinated strips on the dehydrator trays, leaving a little space between each piece for airflow. Depending on the thickness of the strips and how chewy you like your jerky, drying takes 4 to 8 hours. Thin slices (about 1/4 inch) are usually ready in 4 to 6 hours, while thicker cuts might need closer to 8.
Dehydrators are also energy-efficient compared to ovens. They consume less electricity, don’t heat up your kitchen, and can handle 3 to 5 pounds of meat at once – perfect for larger batches. Plus, their consistent temperature control helps you avoid over-drying or ending up with jerky that’s too tough to enjoy.
No dehydrator? No problem – your oven can also get the job done.
Using an Oven
If you’re making smaller batches or don’t want to buy a separate appliance, your oven is a great alternative. It’s not as specialized, but it can still deliver delicious results.
Start by preheating your oven to its lowest setting, ideally between 170°F and 200°F. If your oven doesn’t go below 200°F, you can crack the door open slightly with a wooden spoon to let moisture escape and keep the temperature down. Place your meat strips directly on the oven racks, with aluminum foil underneath to catch drips, or use wire racks placed over baking sheets.

Ventilation is key when using an oven. Keep the door open about 2 to 4 inches throughout the drying process to allow moisture to escape and maintain the right temperature. Drying in the oven typically takes 3 to 6 hours, partly because the slightly higher heat speeds things up.
That said, ovens can be trickier to work with. Their temperature isn’t as steady as a dehydrator’s, which can lead to uneven drying. To avoid this, rotate the racks every couple of hours to ensure all the meat dries evenly.
Comparison Table: Dehydrator vs. Oven
Here’s a quick side-by-side look at how dehydrators and ovens stack up:
| Factor | Food Dehydrator | Oven |
|---|---|---|
| Temperature Control | Precise, steady 160°F | Less steady, 170°F–200°F |
| Drying Time | 4–8 hours | 3–6 hours |
| Power Use | 300–600 watts | 2,000–3,000 watts |
| Batch Size | 3–5 pounds | 1–3 pounds |
| Kitchen Heat | Minimal | Warms up the kitchen |
| Ease of Use | Set it and forget it | Needs regular monitoring |
| Initial Cost | $50–$200 for a good model | Uses what you already have |
| Air Circulation | Built for even airflow | Requires door propping |
Both methods can yield delicious jerky, but dehydrators tend to offer more consistent results with less effort. If jerky-making becomes a regular hobby, investing in a dehydrator could save you time and energy. But if it’s just an occasional treat, your oven is a perfectly good option with a little extra attention.
sbb-itb-5ae85c5
Getting the Right Texture and Flavor
Nailing the perfect jerky texture and flavor comes down to knowing when it’s done and fine-tuning the process to suit your taste.
Testing for Doneness
The bend test is your go-to method: a properly dried strip should bend slightly without snapping and reveal tiny white fibers along the bend.
For extra confirmation, try the tear test. A good piece of jerky will tear with some resistance, leaving slightly jagged edges. If it feels too spongy or won’t tear, it needs more drying time.

When it comes to doneness, texture trumps color. Depending on the marinade and type of meat, jerky can range from deep brown to nearly black. What’s important is that the surface feels dry – not brittle like a cracker.
For safety, the internal temperature of your jerky should hit 160°F during drying. If you’re using an oven set between 170°F and 200°F, you’re already in the safe zone. A dehydrator set to 160°F also ensures your jerky is safe to eat.
Once you’ve confirmed the jerky is done, you can tweak its texture and flavor to make it just right.
Adjusting Texture and Seasoning
If your jerky turns out too tough, you can soften it by sealing it in a container with a damp paper towel for 12–24 hours. On the other hand, if it’s too soft, pop it back into the oven or dehydrator for 30–60 minutes, checking every 15 minutes to avoid over-drying.
Flavor adjustments are just as important. If the jerky tastes bland, try brushing it with a liquid seasoning like soy sauce, Worcestershire sauce, or hot sauce, then dry it for another 30 minutes. For dry seasonings, mix them with a small amount of oil to help them stick, apply sparingly, and give the jerky another 30 minutes of drying time.
To ensure consistent results, stick to 1/4-inch thick strips for even drying across the batch.
Key factors like salt and fat content also play a role. Salt helps draw out moisture, giving the jerky a firmer texture, while a bit of fat from marbled cuts can add tenderness. You can also include a touch of oil in your marinade to fine-tune the texture. With these small adjustments, you’ll have full control over your jerky’s texture and flavor every time.
Storing and Eating Homemade Jerky
Keeping your homemade jerky fresh depends on how well you store it. The main goal? Keep moisture and air away from your jerky to maintain its quality.
Storage Tips to Keep Jerky Fresh
Once your jerky reaches the perfect texture, proper storage is key to extending its shelf life. Airtight containers – like glass jars, sealed plastic containers, or vacuum-sealed bags – are your best bet to block out air and moisture.
- Short-term storage: Store your jerky at room temperature in an airtight container for up to one week. Make sure the jerky has completely cooled before sealing; leftover heat can create condensation, leading to mold.
- Refrigerated storage: Keep your jerky in the fridge to extend its life to about 2–3 weeks. The cool, stable temperature slows down spoilage.
- Freezer storage: For long-term storage, freeze your jerky. If vacuum-sealed, it can last 6–12 months in the freezer. If you don’t have a vacuum sealer, press as much air out of the freezer bags as possible before sealing.

If you’re serious about jerky-making, investing in a vacuum sealer can make a big difference. It reduces air exposure, especially when combined with refrigeration or freezing, helping your jerky stay fresh much longer.
Be on the lookout for spoilage signs like white spots (mold), unusual smells, or a slimy texture. If you notice any of these, toss the entire batch to avoid health risks.
Portioning and Packaging for Convenience
Once your jerky is safely stored, portioning it properly can make snacking and meal prep easier. Breaking it into smaller servings also helps maintain freshness.
- Snack-sized portions: Pack 1–2 ounces in small bags or containers. This way, you can grab a single serving without exposing the rest of your jerky to air and moisture – perfect for quick snacks on the go.
- Meal prep portions: For larger servings, measure out 3–4 ounces into separate containers. This setup ensures you always have a ready-to-eat, protein-packed option for meals or snacks.
In humid areas, food-safe silica gel packets can help absorb extra moisture. Just make sure they’re kept out of reach of kids.
If you’re planning to gift your homemade jerky, small mason jars or decorative tins work beautifully. Add a label with the date and storage instructions for a thoughtful touch. For travel, use resealable bags or sturdy containers to protect the jerky from exposure or damage along the way.
Conclusion: Make Your Perfect Snack with Wild Country Meats
Making your own jerky is not just satisfying – it’s a chance to take charge of every detail of your favorite protein-packed snack. From choosing the right cut of meat to nailing that perfect chewy texture, each step lets you tailor flavors to match your taste. And it all starts with picking the right meat.
Choosing lean, high-quality cuts is key since extra fat can shorten shelf life. Opt for cuts with less than 10% fat and trim away any visible fat for better flavor and longer storage. Freshness also matters – meat without dark spots or unpleasant odors ensures the best texture and natural beef taste.

Whether you’re using a dehydrator or an oven, keeping the temperature steady and ensuring good airflow are essential for achieving the right texture and flavor. Once you’ve got your meat prepared, the marinade is where the magic happens. From a simple salt and pepper mix to bold combinations with soy sauce, Worcestershire, and a variety of spices, the flavor possibilities are endless.
Storing your jerky properly is just as important. Use airtight containers to keep it fresh, whether you’re storing it at room temperature, in the fridge, or in the freezer. Dividing your batch into snack-sized portions makes it easy to grab a quick protein boost whenever you need it.
At Wild Country Meats, we provide the premium, lean cuts that are the foundation of great jerky. With decades of experience as a family-owned processor since 1998, we’re here to help you create a snack that’s packed with flavor and made just the way you like it.
FAQs
What are the advantages of using a dehydrator instead of an oven to make jerky at home?
Using a dehydrator to make jerky comes with some clear perks compared to using an oven. These devices are built specifically to dry food evenly, thanks to their ability to circulate low heat and maintain steady airflow. This helps you avoid issues like over-drying or uneven textures, giving your jerky that ideal chewy consistency.
On top of that, dehydrators are typically more energy-efficient and much easier to clean than ovens, making the whole process simpler and less of a hassle. If you’re planning to make jerky often, investing in a dehydrator can help you produce consistent, high-quality batches every time.
How can I customize a jerky marinade to match my taste or dietary needs?
You can fine-tune a jerky marinade to match your taste preferences or dietary needs by adjusting the ingredients. Want to change up the flavor? Try experimenting with herbs and spices like garlic, paprika, or cumin. Need to tweak the acidity? Add a splash of lemon juice or vinegar to balance the taste.
If you’re working around dietary restrictions, there are plenty of options. Use gluten-free soy sauce for those avoiding gluten, swap sugar for low-carb sweeteners to make it diabetic-friendly, or stick with plant-based oils and seasonings to keep it vegan.
Think about the marinade’s main goal – whether you’re aiming to tenderize or enhance flavor – and pick ingredients that pair well with your choice of meat. Don’t hesitate to get creative and taste as you go to find the perfect mix for your jerky!
How can I tell if my homemade jerky has gone bad, and what’s the best way to keep it fresh?
Homemade jerky can go bad if you notice signs like a sour or unpleasant smell, visible mold, or a texture that feels slimy, sticky, or unusually soft. Always take a moment to inspect your jerky before eating it.
To help your jerky stay fresh for longer, store it in an airtight container in a cool, dry spot. After opening, refrigerating it can further extend its shelf life. Keep an eye out for any changes in color, smell, or texture to make sure it’s still safe to enjoy.